Who Am I? And Why Am I Here?

Elewys of Finchingefeld, GdS, JdL
Barony of Aquaterra, Kingdom of An Tir

This is a place to which I may post my research, my experiments, my successes...and yes, my failures...for medieval re-creation and research on my never-ending quest to learn and revel in knowledge and experiences.

I am a lady of many times and many places. Currently using a 15th century English name, dressing in a 10th century Danish dress, and camping in a Mongolian round house. "Lost" doesn't even begin to describe my persona.

Tuesday, January 27, 2015

Applesies at Ursulmas

It was Event Weekend last weekend!  We had our Barony's big demo at the Fairgrounds that had record-breaking numbers.  This was my view for the weekend.  Not as Regal and Medieval as one might like.  It is the grandstands of the racetrack.  Most of the action was held in the big building next door.


I finished up the "S" pattern rather quickly in anticipation for a demo at the Fairgrounds last weekend.  Since I couldn't exactly take an empty loom for display, I warped up the first pattern in Applesies & Fox Noses, which is another Iron Age find from Finland.  It almost looks like it was getting warped up and they ran out of thread...or cards...so they just went with what they had.


This is another seriously fast weave.  I have about a yard done already.  I'm looking forward to doing some more out of the book!  This is #1:  Colorful Small Applesies

Here are the pieces that I had on display.  I was next to my weaving buddy, Emma, so I loaned my weaving stuff for her display.  She then won the prize for best display.  Again.  Glad I could help...no, I'm not upset--she puts together a great display!


I also warped up the rigid heddle loom, although I really should have used a smaller yarn; the heddle is too small for this thick yarn.  But hey, it was an experiment.


And finally, I set up and made some progress on the warp-weighted loom.  Although I don't know if you can legitimately call it a "warp-weighted" loom if the warps are not yet weighted.  I was talking with a couple of other weavers there, and they gave me some really great advise on how to proceed and tips on how to prevent issues.  You can't see it very well in the display (below) so I took a picture of it set up in my living room.

My artsy-friend and I set up a Lampworking area in the demo hall at the event.  We have great ideas for improvements...although my kiddo is pretty awesome as part of the backdrop.  She very carefully strung 10 feet worth of beads to help reduce the loss (we had a few things disappear from the table...sadly).

I made a few beads on commission for a braid-bearded man...


I also made sets of beads for Kingdom largesse.  They are running really low, so they asked for sets of 3--one large and two smaller beads.  I only got 3 sets done, but I hope to make more in the upcoming weeks and deliver them at Kingdom A&S in March.

I don't know if I can make quick and easy weaving for largesse--maybe I can do some smaller "test" pieces that I will donate.

Tuesday, January 20, 2015

Applesies and Fox Noses!

Happy new year, all!

All I wanted for Christmas was a copy of Applesies and Fox Noses...and a bike helmet.  Lucky me--I got both!

Applesies and Fox Noses - Finnish Tabletwoven Bands

This is the new go-to book for tablet weaving historians this year (it's a bigger genre than you'd think!).  Several of these patterns (not all) are based on historical finds from the Karelian iron age in a graveyard just a short drive north of Helsinki.

This book has some seriously complex patterns in it, but the first few look simple enough, so I started there.  The first pattern wasn't quite so inspiring, so I turned a couple more pages and decided on pattern #5, the S Sign.

Now, because this is in a book, I'm not sure if this is something I can publish in its entirety, so to avoid a problem with the authors, I'll just show you the turning sequence, which seems different than how the pattern is laid out*.

1.  With A-D at the top of the pack, (my cards are colored blue on that side), turn all the cards back for five quarter-turns (toward the weaver).
2.  Split deck:  cards 1-6:  turn four quarter-turns back; cards 7-12: turn four quarter-turns forward.
3.  Turn all cards five quarter-turns forward
4.  Turn all cards five quarter-turns back
5.  Split deck:  cards 1-6:  turn four quarter-turns forward; cards 7-12:  turn four quarter-turns back
6.  Turn all cards five quarter-turns forward

*All cards have to face right, and there may be some adjustments in the future since I threaded it backwards to begin with...

Wednesday, January 14, 2015

So I'm Weaving Along...

...on this pattern, that weirdly, doesn't look anything like the image...which is quite possibly a threading issue--I'll have to try this again when I get to the end.  You know what they say--it's not a mistake, it's a new pattern!


...and something goes wrong.

The tension bar on the inkle loom that I've been using for 20 years finally died...the threading inside the wooden bit was not lined with a metal fitting; it's just wood.  So after 1000 yards of trim or so, it stripped out.


I tried to use my cheap-n-scuzzy "surfboard" loom but the tension was unreliable and the bolt chewed through one of my threads.  It was time to move ahead to the next plan.


Not wanting to waste time, I went ahead and built this in two days:


While it's not quite finished, it might work well enough for both tablet weaving and rigid heddle weaving with a few minor alterations.  In fact, I have an idea for a temporary improvement...ooooo....

In the process of building, I had a few set backs during the build...was locked out of some areas of the wood shop...


...but hand-held power tools were available and I made full use of them!

And on the third day...


...I added the front and back bars (only one pictured here, along with, for some inexplicable reason, the broken tension bar from the inkle loom).  I attempted to warp up the card weaving on the loom but didn't have any luck doing so.  Eventually, I gave up because the tension was not consistent.

My dear husband went to the hardware store and in about 90 minutes had fixed the tension bar for the inkle loom, so now I am back in business!  It took a couple hours to re-warp the card weaving onto the loom, then had to take it apart again to adjust the tension again to accommodate the shortened length--this loom really needs TWO tension bars for card weaving.

I still have a quilt commission to finish and a bunch of uniforms to repair, but...you know... I'd rather be weaving. :)

Tuesday, January 6, 2015

Advanced Card Weaving: Birka 12

Here's another fun pattern for you history buffs!  This is Birka find #12
Ткачество на дощечках - Szukaj w Google
This person (Russian, if I figure it correctly) has already mapped out this pattern pretty clearly, it's just a matter of knowing how to read the thing.

Warp your cards like it shows above.  Turn your cards to the AD "home" position.

Turn all the cards four quarter-turns forward, passing the shuttle between each turn.

When you have returned to the home position, you will split the deck.  Turn cards 1, 8-13 forward (away from you); 2-7 back (toward you).  You will do this for three quarter-turns.

Then...reverse!  Turn cards 1-7 forward; 8-12 back; and 13 forward.  You will do this for three quarter-turns, back to the home position.

Repeat the pattern--four quarter-turns forward, then the split pack.

As you can see, this means that the 1 and 13 cards are always turning forward...the rest of the cards will be turning four quarter turns forward at the end of every pattern.  This results in a great deal of twist in the threads, which you will have to eventually deal with.  About every yard and a half of completed weaving, I will untie the knots (one card at a time) and untwist.  It's just the way this pattern works.  I often will turn the 1 and 13 cards with the cards adjacent to them, which still builds up a twist, but not at twice the speed.

Here's mine, in progress...


And finished!

Thursday, January 1, 2015

Beginning Card Weaving: Getting Started


Card Weaving (aka Tablet Weaving) is an older-than-you-think weaving technique of making narrow bands or finished edging on other woven goods.  It's been found in Egyptian digs and Iron Age Finnish digs--and that's a lot of geography in between!

While it would be fun to go into all the history and things, you can find all that elsewhere, like here, and here, and any number of available books on the market.

But I'm here to provide you with a step-by-step guide to starting your first tablet weaving project (or offer a refresher course if it's been a while).  I've got two different projects going on in these photos...I apologize if this is confusing.

First you may need a quick overview of some of the weaving terms.
Warp - the threads that run the length of the work--on a bolt of fabric, it would be the 15 yards' length
Weft - the threads that run back and forth through the warp for the width of fabric.
Cards / Tablets - same thing.  Four- or six-hole cards for weaving.
Shuttle - item the weft threads are wrapped around and is used for beating rows of weaving
Beating - the pressing down of each pass of the shuttle to compress the threads
Shed - opening between the top and bottom threads through which the shuttle passes.
Turning - changing the shed with the cards by rotating 1/4 turns

The supplies are rather simple:
  • 2 to 3 colors of carpet warp or crochet cotton thread, high contrast--light, medium, dark. You can pick up crochet cotton pretty cheaply at just about any craft store.  Michael's, JoAnn's, Walmart...whatever is closest to you. There are also several online options, like yarn.com, dickblick.com and greatnorthernweaving.com.  
  • 4-hole cards which can be purchased here, or here in packs of 25, or you can make your own here.  I've seen people make them out of playing cards or cereal boxes or even bar coasters, but just be sure that the holes punched in them all line up.
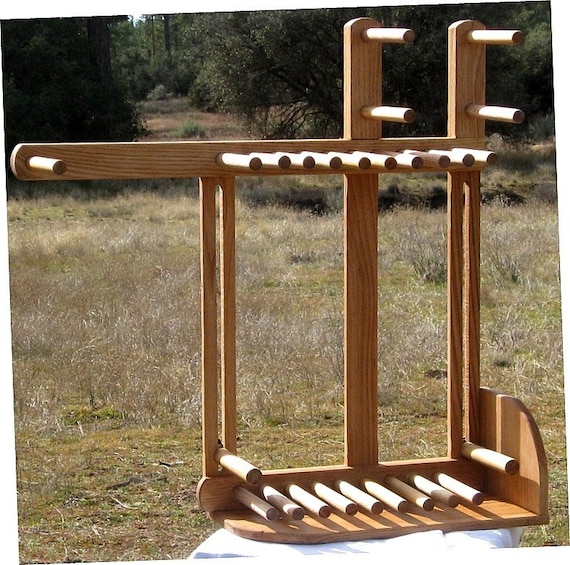
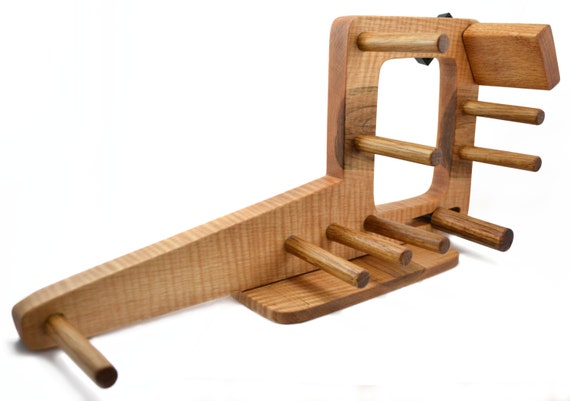
  • A loom.  This is the trickiest bit.  Some people like to have a backstrap loom, which means you anchor it to your waist by a belt then another fixed point, like a doorknob or a railing.  This rather limits mobility, especially if you can only weave for a few minutes here and there, so others prefer to use a loom.  Inkle looms are popular, especially if you are also interested in inkle weaving (two-shed weaving with heddles instead of cards).  


Mini Inkle Loom, Tablet Weaving, Card Weaving Loom With Double Tension System - Handcrafted From Solid Maple & Red Oak - 15 Inch<--- Some are miniature and only weave a couple yards of very narrow or delicate bands...

Card / Inkle weaving loom - 100 percent red oak/maple/walnut/cherry 18 yard warp
<---...others are enormous and can weave 18 yards or more of serious trim.  Note that there are *two* sliding tension bars!

There are ways to create some simple loom systems that involve clamps and 2 x 4s...you'll have to do some research on the internet or Pinterest and find a loom system that will work for you.  There are plans to make a quick-and-dirty loom from PVC for about $10.

For a first weaving project or for testing new patterns, I would recommend starting with short lengths; try a one-yard project.  If, after warping up 18 yards of a Loomzilla, you may decide that you hate the pattern and it'll take forever to take it apart and could result in yards of wasted materials.  I warped up a loom for four yards of a brocade weaving project that I abandoned about 10" in.  Luckily, I was able to use the thread for a 3 yard weaving project later.

If this is your first project, starting with something simple is the way to go.  This is a nice one from the Evil Queen of Spades on DeviantArt.com (sorry it's blurry):


If you follow the link, you will see she's got a number of great patterns with both 4-hole and 6-hole cards (which, for beginners, is more advanced card weaving that you don't need to get involved in yet).  I have tried several of them and love the way you can make it very different just by changing colors.  Most look just like this pattern above--no card or hole numbering.  I'll help you bridge that gap.

I did this up on Excel, which is how I do a lot of my patterns.  Some people like to use GTT or the Loomybin, but I've had difficulty getting them to work for me.  It's not the programs' fault--I'm just not that computer-savvy.


As you can see from this pattern, this one needs 12 cards. You will warp it up with the #1 card on the left, the #12 card on the right, just like reading a book.  Number all your cards on the backs, 1-12 (in pencil). This will help you keep them organized.

The front of the cards have four holes, labeled A, B, C and D.  Each hole will have one string in it; four strings per card.  If you look above at the pattern, each square represents one thread.  On Card 2, hole A is yellow, B is yellow, C is pale blue, and D is green; that's four threads running through one card.

The next logical question is "what is S and Z under the rows?"  This is the way each card is threaded.  This makes the threads angle inward or outward to create a pattern.  It can make a difference between a wiggly line and a fuzzy line on your band.  When you thread the card, all the threads must go through the card the same way--you can't have some of them S threaded and some Z threaded.  That just won't work.

As you can see from this diagram (the card is the dark line in the center), S threading has the threads going from the back of the loom through the card from left to right.  Z threading goes from right to left.
Z and S Threading for tablet weaving

  
So above are two pictures:  the left is S threaded--the threads go from the top peg through the front of the card...the right is Z threaded--the threads go from the top peg through the back of the card.

Warping board:
If you are using a warping board, you will need 18 dark strands, 20 medium strands, and 10 light strands of string.  Since I use an inkle loom, I warp as I go, so I don't need to pre-cut any threads.

Warping:
If you are using an inkle, move your tension rod to the longest position.  On my loom, because it has a switch-back, it's to the far right.  (PS - the green elastic on there is to hold my shuttle during transport...this isn't an essential part of the loom.)

Lazy Kate:
In order to more easily pull threads to warp your loom, you may want to construct a Lazy Kate.  There are some fancy ones out there that you can buy, but I went the quick-and-dirty route by using a cardboard box and a 1/2" dowel.  Punched a couple holes in the box with a pair of pointy scissors, threaded the dowel through, and boom!  Lazy Kate.
With all the spools on the Lazy Kate, you can pull all colors at once, saving precious time.


As I said, you will warp it up with the #1 card on the left, the #12 card on the right, and you will have the the top surface of the cards (with ABCD) facing left.  If you have the cards facing right, the pattern will show up on the bottom of the weaving.  Also, note that the pattern is lettered DCBA from top to bottom.  If your pattern is written up as ABCD, the cards will have to face right...but that's notes for future pattern.

Tying the ends.
When I warp my loom, I leave long 3" tails for each thread.  I put all four threads for one card together and tie the beginning and ends in a square knot.  If there is an issue with one thread being too loose or breaking, you can much more easily fix it by isolating that one card and fixing the problem.  Tying them individually can also create tension problems and mean four times as many knots in the end.  Remember back to your Girl Guide or Scouting days--right over left and under, left over right and under.

Actually, I like to use a surgeon's knot, which is left over right and under twice, then right over left.  This helps secure the knot and also makes untying the knots easier at the end.  The warp needs to be taut, but you don't need to pull the warp super-tight.  Too much tension on the warp can warp your pegs...so to speak.

Once all the cards are threaded and the tension looks even, it's time to begin!


Notes on shuttles.
Shuttles can be just about anything you want to use.  I've used wooden rulers to hand-carved shuttles by masters of the craft.  As long as it's rigid, does the job, and is comfortable for your hands, it's all good.  Bonus:  wooden rulers can be found for under a buck.

Wind several yards of weft threads (that's the name for the thread that goes from side to side--or from wight to weft...as I say...) onto your shuttle.  Generally speaking, you will want to use the same color thread as the threads on the #1 and #12 cards (or whichever is the last card on the right).  This will help blend the weft into the edges so any little mistakes in tension won't be glaringly obvious.

Turning the cards.
For this pattern, all the cards will turn 1/4 turn in the same direction.  After four quarter-turns, you will reverse the direction and weave in the opposite direction.

As you can see in this image, I have colored one edge of the cards with a red permanent marker--this is the BC side.  On the opposite side, the AD side, I have colored the edges blue.  This helps you make sure you know where you are during the weaving process.  The blue edge, when A and D are on the top, is the "home" position for many patterns.  You can, of course, reverse directions at any time, but if you are going for a repeating pattern, knowing the home position is important.


Pass the shuttle through the shed (the opening between the upper and lower threads), and pull the thread down towards the knots on your warp.  Turn all the cards 1/4 turn and pass the shuttle again.  Press down--beat--with your shuttle.


You'll note that there's a little loop on the right side--this is left back to help maintain good tension.  You don't want to get wobbly edges, so when you weave follow these steps:

*  Pass the shuttle, leaving a loop behind
*  Turn the cards
*  Beat
*  Pull the weft thread to incorporate loop
*  Then repeat!

After a time, it becomes rather meditative.

Advanced Card Weaving: Birka 6: the Kivrim Band

I've been working on an "Introduction to Card Weaving" post, but ran into some technical difficulties Several hours into creation, the computer shut down, and inexplicably, the post was not saved, despite my having clicked on the "Save" button numerous times throughout the process.  I have no idea what happened, but it was a significant set back.  Images gone.  Text gone.  My mini glossary gone.  In many ways, it was almost back to the first outline I created.  Seriously frustrating.  Hopefully I can get that back up to where it was and get it posted soon.

In the meantime, I will post a quick lesson on Advanced Card Weaving.  There are many different Kivrim patterns which apparently means "Bent" (although Google Translate doesn't have the word in its dictionary for any language).  This is a split-pack weaving technique, which means that the cards will be turning in different directions, singly or in groups.  Proper threading and turning will result in some stunning patterns!  You can find several different varieties on the Loomy Bin, including the Egyptian Diagonals patterns.

This was a great lesson for me to learn how to read patterns that have no instructions--that is, those that have slashes in the boxes that change from left-leaning to right-leaning; from slash to back-slash.  I had never done such a thing before, so I feel like I made a huge leap forward in my tablet-weaving journey.

Here's an example of one of those patterns...

Muster zum Brettchenweben: Diagonalmuster - Kivrim

Looks confusing, doesn't it?  Well, my brain doesn't like looking at it.  I prefer to have it written out, which can take some time doing the translation.  I had the same issue when I was learning to knit, so perhaps in time, I will be able to look at this kind of pattern and untangle it in my head, but for now...it's long hand.

The pattern I decided on was Birka 6, one of several card woven bands found at Birka, a former trade site in Sweden which uncovered a great number of artifacts in an archaeological dig.
Birka 6
The bottom four rows are, of course, the threading diagram.  The cards are threaded DCBA, so face those cards left!  I chose two colors, a dark burgundy red and pale yellow for my project.

Looking at the diagram, you will see the first six cards are Z threaded, and the last five are S threaded.  Here's a great diagram to remember how Z and S threading works:
Z and S Threading for tablet weaving
If you're weaving along with me, go ahead and get out your thread, your cards, your loom, and warp up your cards!  I'll just go make a cuppa and meet you back here....

Ready?  Great!

Through experimentation, I discovered that you start this pattern with the AD position on top.  For the first four quarter-turns, you turn the cards away from you, which will form the V formation as you see in the threading diagram.  We'll call this motion "Forward" (since it appears to be the industry standard, although it feels backward in my mind...).  This first few rows will, of course, look sloppy and messy...as an experienced weaver, you know it always does at the beginning!

The next phase is looking at the boxes where the slashes change direction--that indicates a reverse in the card direction.  The author of this image made dark lines every two rows, which conveniently points out that the pattern of card-turning changes every two rows.  You will turn the cards two quarter turns, passing the shuttle for every quarter-turn, then adjust your cards for the next two rows.

Here is what I charted out (and you'll forgive me for not following the pattern exactly and changing directions of the first and last cards on the selvage--I never liked the idea of two cards constantly twisting up in one direction while the others moved forward and back equally.  It does make the edges a little more rough, so if you want smooth edges, turn them only forward and you can always reverse to only backwards after a while.)  These directions are written so each "turn" is a quarter-turn of the cards, and the shuttle is thrown every quarter-turn.

A)  Turns 1-4:  turn all forward
B)  Turns 5-6:  1-6 Forward; 7-8 Back; 9-11 Forward
C)  Turns 7-8:  All Back
D)  Turns 9-10:  1-6 Back, 7-8 Forward; 9-11 Back
E)  Turns 11-12:  1-3 Forward; 4-6 Back; 7-11 Forward
F)  Turns 13-14:  1-5 Forward; 6 Back; 7-11 Forward
G)  Turns 15-16:  1-3 Back; 4-6 Forward; 7-11 Back
H)  Turns 17-18:  1-5 Back; 6 Forward; 7-11 Back
I)  Turns 19-20:  All Back


If you are doing the edges all one direction, the directions are:
A)  Turns 1-4:  turn all forward
B)  Turns 5-6:  1-6 Forward; 7-8 Back; 9-11 Forward
C)  Turns 7-8:  1 Forward; 2-10 Back; 11 Forward
D)  Turns 9-10:  1 Forward; 2-6 Back, 7-8 Forward; 9-10 Back; 11 Forward
E)  Turns 11-12:  1-3 Forward; 4-6 Back; 7-11 Forward
F)  Turns 13-14:  1-5 Forward; 6 Back; 7-11 Forward
G)  Turns 15-16:  1 Forward; 2-3 Back; 4-6 Forward; 7-10 Back; 11 Forward
H)  Turns 17-18:  1 Forward; 2-5 Back; 6 Forward; 7-10 Back; 11 Forward
I)  Turns 19-20:  1 Forward; 2-10 Back; 11 Forward

When the cards have twisted too far in one direction and it starts to affect your tension, reverse the cards 1 and 11 to Back, which will untwist them.  When they are twisted too far in the opposite direction, start turning forward again.
Here's the finished piece!  It's only 5' 6" (not quite 2 feet), but since it was a test piece, I didn't want to make a full-length 4-yard piece if I didn't find it fun or workable.

I hope these instructions help you to make your own Birka band.  Good luck!  I hope to see lots more period pieces made and displayed on garb at upcoming events!